Language Understanding in C# with LUIS
Getting started predicting with Language Understanding (LUIS) in C# using Azure Cognitive Services
In this article we’ll explore how to use C# to get intent predictions from a Language Understanding (LUIS) endpoint. This can be used to intelligently categorize user input into one of several different pre-registered intents that the application can handle, even if the application was not programmed to expect the exact text the user entered.
Note: LUIS will be retired in 2025 and replaced with the new Conversational Language Understanding (CLU) service which is still in preview. As of the time of this article, it is my recommendation that you use LUIS instead of CLU because the SDK capabilities far exceed those currently available in CLU.
For best results, this article assumes that:
- The reader understands the basics of LUIS, particularly intents and utterances
- The reader understand how to create and configure a LUIS endpoint
- The basics of programming in C#
However, as a quick review, LUIS is short for Language Understanding Service and is part of Azure Cognitive Services. LUIS is designed to classify pieces of previously-unknown text into the closest matching registered intent your app has declared using a machine learning model.
When you create your LUIS app, you provide different intents and sample utterances for each intent and LUIS memorizes the patterns it observes in your intents. This way, when new utterances come in that it hasn’t seen before, it can make its best guess as to which one of these intents the utterance belongs to.
Conversational AI Workflow using Azure Cognitive Services
LUIS can help any application that has a series of known commands and a way for users to enter in those commands, either through text or by spoken words.
Note: speech must first be translated through speech-to-text in Azure Cognitive Services or a similar service and cannot be directly provided to LUIS
Before we dive into code, let’s outline the high-level approach an app needs to take to take advantage of LUIS' capabilities.

First, in order to use LUIS, you must create, configure, train, test, and deploy a prediction endpoint in Azure. This is the topic of my previous article on LUIS and will not be detailed here.
Next, you need to have any type of C# project. It could be a console application, ASP .NET web application, WinUI desktop app, or even an old-fashioned Windows Service. As long as it is built in .NET Framework 4.5.2 or any version of .NET in the past decade, it should be able to run cognitive services without issue. Check the project dependencies for more information.
After that, you’ll add a NuGet reference to Microsoft.Azure.CognitiveServices.Language.LUIS.Runtime, allowing you to work with Microsoft’s published SDK for getting LUIS predictions in your app.
Next, you’ll create a LUISRuntimeClient and tell it your LUIS endpoint and authentication key.
After that, you’ll generate a prediction by calling the Prediction.GetSlotPredictionAsync() method on your LUISRuntimeClient instance, which will result in a PredictionResponse containing the Prediction you care about.
Using this Prediction, you can determine the top intent that was matched and the confidence LUIS had that this was the correct intent for the utterance. After that, your app can react accordingly to respond to the user’s input.
Let’s drill into these steps in more detail.
Adding NuGet references
The first thing you need to do is add a package reference to Microsoft.Azure.CognitiveServices.Language.LUIS.Runtime. This can be done via a variety of different ways, from NuGet Package Manager in Visual Studio to the package manager console or .NET Clustering.
First, to install it in Visual Studio using the user interface, you’d right click on the project in Solution Explorer and then choose “Manage NuGet Packages…"

Next, click Browse and then search for Microsoft.Azure.CognitiveServices.Language.LUIS.Runtime
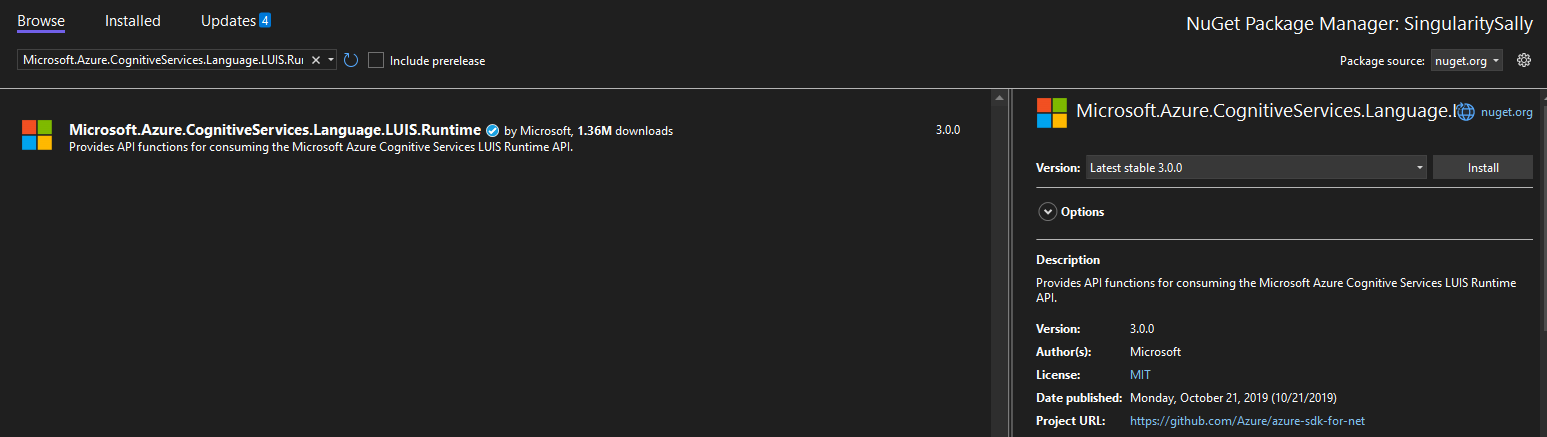
Select the package and then click Install, making sure to read any license agreements and dependencies closely.
See Microsoft’s documentation on NuGet package manager for additional details on NuGet package manager.
If you’d rather use a command line to install the reference, you can do so using package manager console or .NET CLI.
In the package manager console, you can run the following command:
Install-Package Microsoft.Azure.CognitiveServices.Language.LUIS.Runtime
Using the .NET CLI you’d run the following:
dotnet add package Microsoft.Azure.CognitiveServices.Language.LUIS.Runtime
Authenticating with Azure Cognitive Services
In order to work with Azure Cognitive Services and LUIS, we’ll need to add a pair of using statements to whatever class we want to work in:
using Microsoft.Azure.CognitiveServices.Language.LUIS.Runtime;
using Microsoft.Azure.CognitiveServices.Language.LUIS.Runtime.Models;
Once these using statements are in place, we can declare a LUISRuntimeClient. However, we’ll need to make sure we know a key and endpoint to use before we do so.
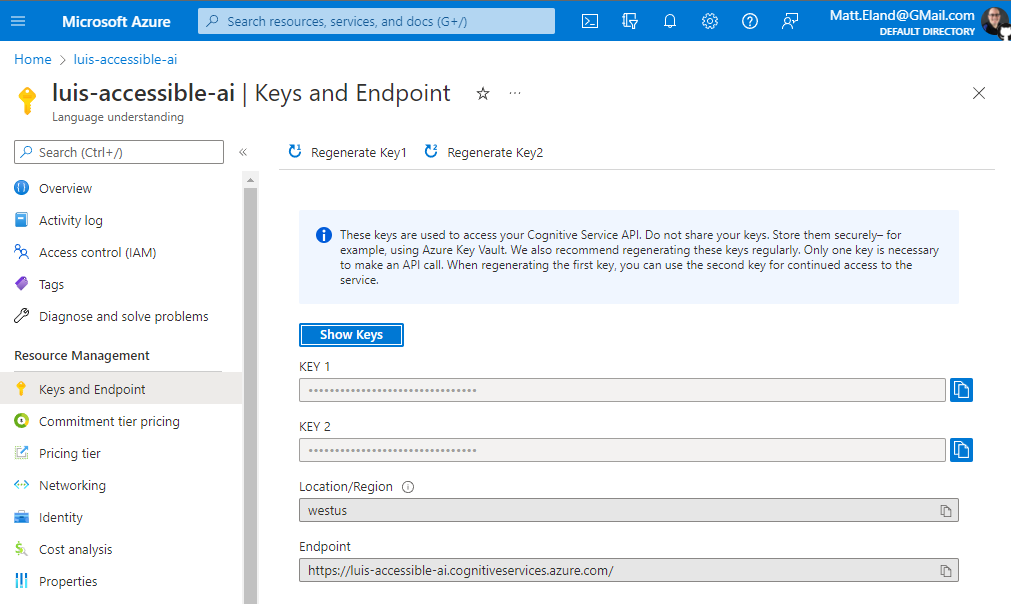
You can find your keys and endpoint in the Azure portal for your Language Understanding resource under the Keys and Endpoint blade as shown below:
Now that we have these, we can declare our LUISRuntimeClient:
// Create a Client Credentials object that tells Azure you're allowed to call the prediction endpoint
string luisKey = "YourKeyGoesHere";
ApiKeyServiceClientCredentials credentials = new ApiKeyServiceClientCredentials(luisKey);

// Create a runtime client and tell it which prediction endpoint to use
LUISRuntimeClient luisClient = new LUISRuntimeClient(credentials);
luisClient.Endpoint = endpoint;
Important Security Note: In a real application you should not hard-code your LUIS key in your source code or check it into source control. Instead, you should get this key from a non-versioned configuration file via
IConfigurationor similar mechanisms. Checking in keys can lead to people discovering sensitive credentials via your current source or your source control history.
Getting Prediction Results
For our next part, we’re going to need some string the user typed. For our code here, let’s hard-code something in, but in a real app you’d read this from some appropriate way of getting text input from the user.
string userMessage = "This is a sentence the user might have typed in";
Now, let’s talk to LUIS and find the top matching intent for the user’s input.
To do this, we’ll need to create a PredictionRequest and then use that to get a prediction result. However, in order to do this, we’ll need to know the app ID and slot name to use when generating a prediction.ESRBRating
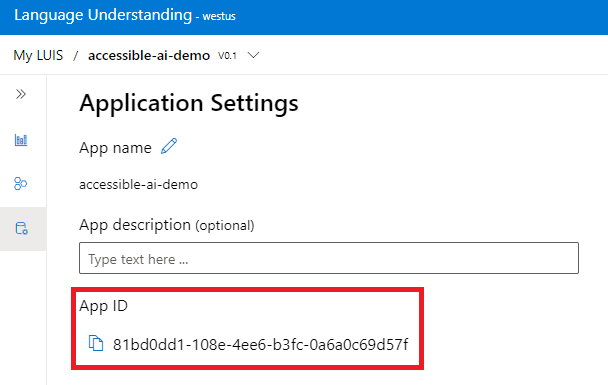
The app ID is a GUID generated by Azure and can be found in luis.ai under the Manage tab on the sidebar:
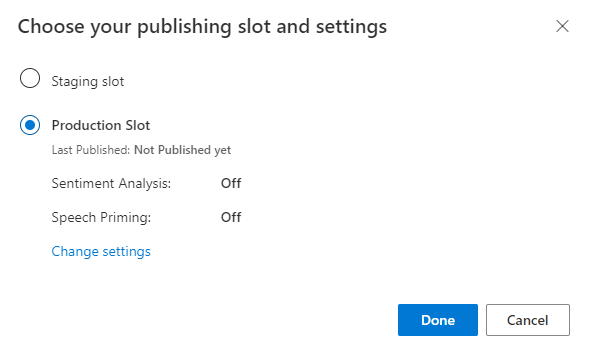
The slot name will either be Production or Staging depending on which of the two slots you want to use. These are the same slots you chose when deploying your trained model in luis.ai earlier:
With all of this information, we now have enough to make a prediction request:
// In a real app, read these strings from a config file for additional security and flexibility
Guid appId = new Guid("YourAppIdGoesHere");
string slot = "Production";

// Make the request
PredictionRequest request = new PredictionRequest(userMessage);
PredictionResponse response = await luisClient.Prediction.GetSlotPredictionAsync(appId, slot, request);
Note here that we call out to GetSlotPredictionAsync which is an async method. If you don’t need async and are calling this from a non-async method, you could instead use the following line:
PredictionResponse response = luisClient.Prediction.GetSlotPredictionAsync(appId, slot, request).Result;
The PredictionResponse contains the prediction results from analyzing the userMessage string you sent over in the PredictionRequest. We’ll explore that response next.
Understanding Prediction Results
First, if you want to just get the name of the top intent (usually the thing you care most about), you can do this as follows:
string topIntentName = response.Prediction.TopIntent;
Here, this will be the exact name of the intent that you defined in LUIS during configuration and training.
However, we also have access to all matched intents and the confidence that each intent was the correct match. You can get access to this via the Intents Dictionary on the response’s Prediction object as follows:
Console.WriteLine("Intents: ");

foreach (KeyValuePair<string, Intent> intent in response.Prediction.Intents)
{
    Console.WriteLine($"Intent '{intent.Key}' has a confidence score of {intent.Value.Score:p}"); // :p denotes % formatting
}
This will loop over all intents that came back and display their names and probability or confidence score.
Usability Tip: It is often a good idea to ignore intents that have a confidence score below a certain threshold, or make your application add some hesitancy in its response as to it’s not certain the result is helpful.
My rule of thumb is to ignore intents below 45 % confidence and add a disclaimer when below 60 % confidence. That disclaimer might look something like prepending the string “I’m not sure, but this might help…" to a response.
Responding to the Top Intent
Now that we know the top intent, we can now use if or switch statements on that to react intelligently in our application.
This code might look like the following:
switch (topIntent.ToUpperInvariant())
{
    case "SOME INTENT":
        // Respond to this intent
        break;

    case "ANOTHER INTENT":
        // Respond to this other intent
        break;

    case "NONE":
        // Tell the user you don't understand
        break;

    default:
        throw new NotSupportedException($"Got intent {topIntent} but this app doesn't support it");
        break;
}
Here we’re making sure we’re using a consistent casing to reduce the odds of programmer error assuming one capitalization and getting another back.
We’re also handling the default case by throwing an exception. This default case can be reached if a new LUIS model is published that supports an intent our app doesn’t know about yet.
This should highlight the need to be careful of how we roll out updates when introducing new intents and to make sure that the .NET application is published before the new LUIS model is published in order to be able to handle with the new intents coming back.
Conclusion
Here we were able to write just a few lines of C# code to authenticate with Azure Cognitive Services and Language Understanding and generate a real-time prediction of user input directly in our application.
It is important to note that our application is now dependent on the LUIS endpoint to generate predictions and that publishing new models to the slot your app is using may impact your application’s behavior if you do not plan your updates carefully. For this reason, it is wise to take advantage of both the Production and Staging slots to verify your app’s behavior when publishing.
However, the Cognitive Services SDK gives us a simple way of interacting with the LUIS AI-as-a-service offerings on Azure and can be the basis of chatbots or other conversational AI agents.