Understanding Language Understanding (LUIS)
Creating and configuring a Language Understanding Resource in Azure Cognitive Services
In this article we’ll introduce Azure’s Language Understanding (LUIS) service and show how you can use it to generate intelligent predictions about what a user is trying to communicate to your system.
We’ll cover creating and configuring the LUIS service, setting up intents and utterances, and testing that service in Azure.
Note: LUIS will be retired in 2025 and replaced with the new Conversational Language Understanding (CLU) service which is still in preview. As of the time of this article, it is my recommendation that you use LUIS instead of CLU because the SDK capabilities far exceed those currently available in CLU.
What is LUIS?
LUIS (pronounced “Louise”) is short for “Language Understanding Intelligent Service” is part of Azure Cognitive Services and essentially let you map text from a user to known commands your app supports using intelligent natural language processing algorithms to help mitigate typos, synonyms, verb forms, and sentences that are different than ones you’ve configured your service for.
That may sound confusing, so let’s look at a silly example.
This is my Cairn Terrier, Jester.

Jester is generally a good dog and is surprisingly smart given the size.
Jester has never taken an English course, and yet he is able to understand a frightening amount of what we say to him. This is because Jester has some known intents that he believes we try to communicate to him.
These intents are discrete commands might look something like the following:
- Take a Walk?
- Get in your crate
- You’re a good body
- Want a treat?
- Want to play?
When I turn to Jester and say to him “Do you want to go on a walk?" or “Hey, how about we take a walk?" or “I was thinking about a walk; would you like that?", he looks at these utterances and is able to match them to an intent, specifically the “Take a Walk?" intent with a given degree of confidence. Jester doesn’t need to understand English to do this, he just knows its similar enough to commands he’s learned before.
Key Point: Intents are broad commands that may have multiple utterances associated with them.
While Jester doesn’t use LUIS, LUIS works in a very similar way: I define known intents that my app supports and provide a list of sample utterances for each intent.
When LUIS gets a command, it matches it against the utterances it knows about and predicts a confidence score that the utterance belongs to each intent.
We can look at the intent with the highest confidence score and react to it, or respond with an “I don’t understand” if no intent had a high enough confidence score for us to react to.
Creating a LUIS Instance
Okay, so let’s get practical. To create a Language Understanding instance, first log in to the Azure Portal using your account (create a free account if you need one)..
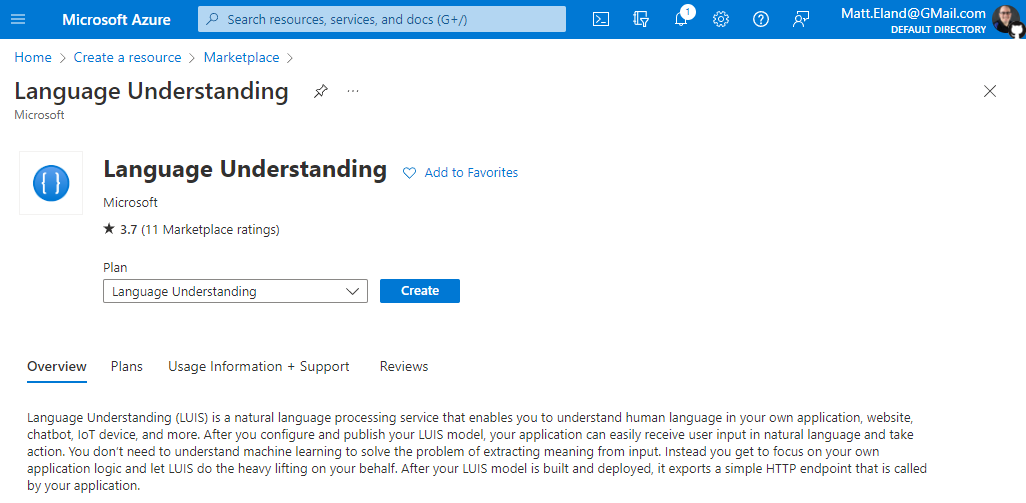
Next, go to create a service and search for “Language Understanding”. Click into the resource and then click Create as pictured below:
Next we need to configure the settings for our Language Understanding resource.
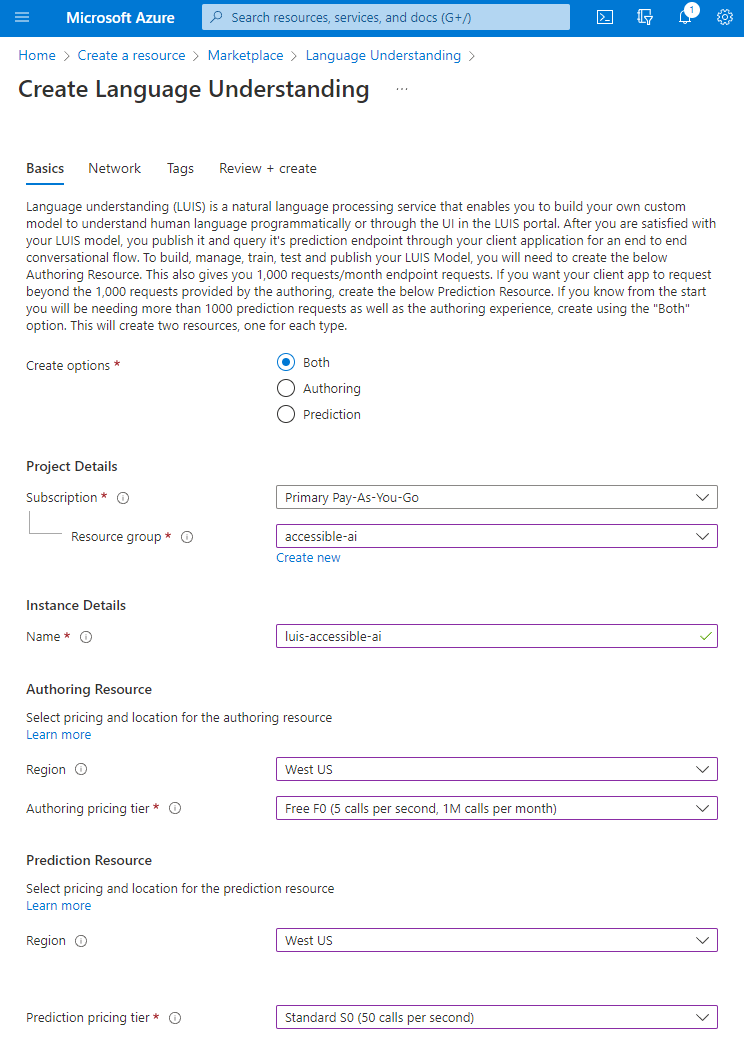
There are a number of settings to configure here, so let’s discuss each one currently offered:
- Create options: this determines whether Azure creates a service for prediction (determining intents from text), authoring (creating intents), or both. Typically you will create both.
- Subscription: the Azure subscription to put the new resource inside.
- Resource group: the Resource group that will contain your Language Understanding resource. I like to use one resource group per project or experiment. Note that you can create a new resource group as needed here.
- Name: a name for your language understanding resource. This must be unique across all of Azure.
- Authoring Resource Region: the Azure region to place your authoring resource. Note that this list is very constrained and has only a subset of the Azure regions. This is usually fine since most traffic will go to your prediction resource.
- Authoring pricing tier: the pricing level of your authoring resource. See Microsoft’s pricing details for current information.
- Authoring Resource Region: the Azure region to place your prediction resource. You’ll want this to be close to your users and other systems that may need to call your prediction endpoint.
- Prediction pricing tier: the pricing level of your prediction resource. See Microsoft’s pricing details for current information.
Once you have these settings configured, click through to review and create and then create your resource.
Creating a Conversation App in the LUIS Portal
While you can look at your Language Understanding authoring and prediction resources in Azure like any Azure service, the real interesting stuff happens at luis.ai.
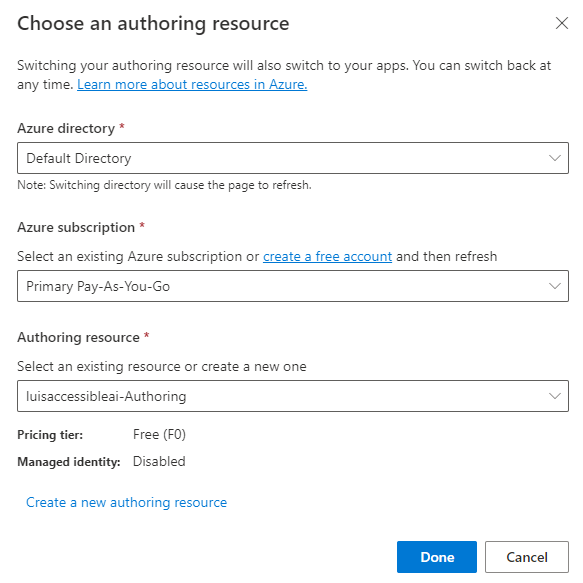
Once you navigate in to luis.ai, you may need to log in again and then choose your authoring resource as displayed below:
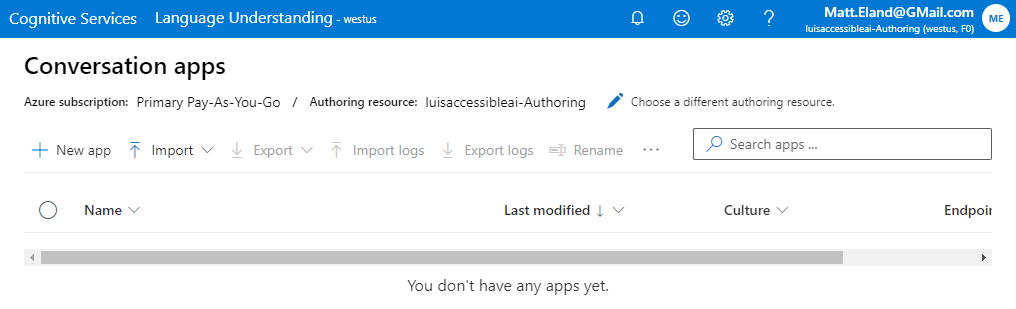
Once you’ve done that, you should see an empty list of Conversation apps:
Conversation apps are collections of LUIS resources that can be used to power a chatbot or other form of intelligent assistant.
Let’s go ahead and create one by clicking New App.
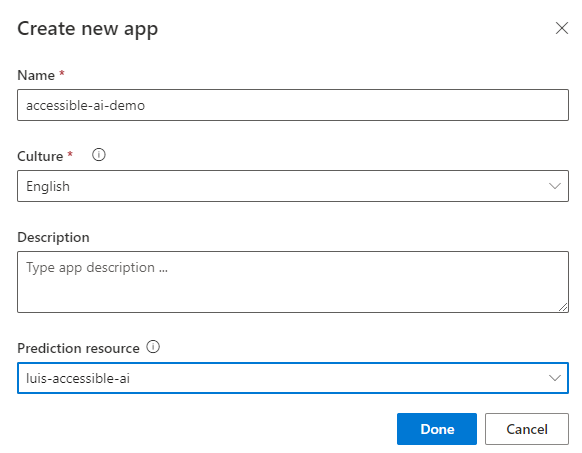
Give your app a name and select the prediction resource you created earlier, then click Done.
After a few moments your app will be created and you’ll be given a quick tour of LUIS and then shown the Intents screen.
Setting up Intents and Utterances
Right now you should see a single intent named None. This intent cannot be deleted and essentially is the intent that should be matched if the user types in something completely random that doesn’t match another intent.
You can click into the None intent and add sample random utterances if you would like as shown below:

However, I typically only populate the None intent after creating all other intents during testing my app. Typically a good time to add something to the None intent is when a user types something random and it gets matched to an intent other than the None intent.
Let’s go back to the list of intents by clicking Build at the top of the screen.
From there, we’ll add a few intents of our own.
For example, if I was looking to replicate my dog’s behavior in Azure, I could add a “TakeAWalk” intent by clicking Create, typing the name of the intent, and then clicking Done.
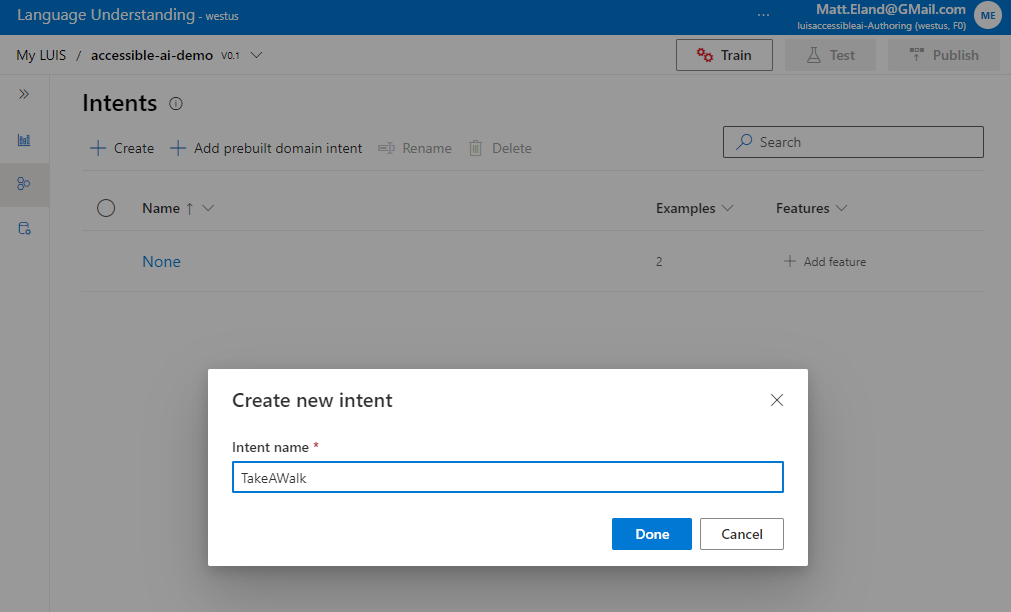
This takes me back into the intent details screen, but for the TakeAWalk intent.
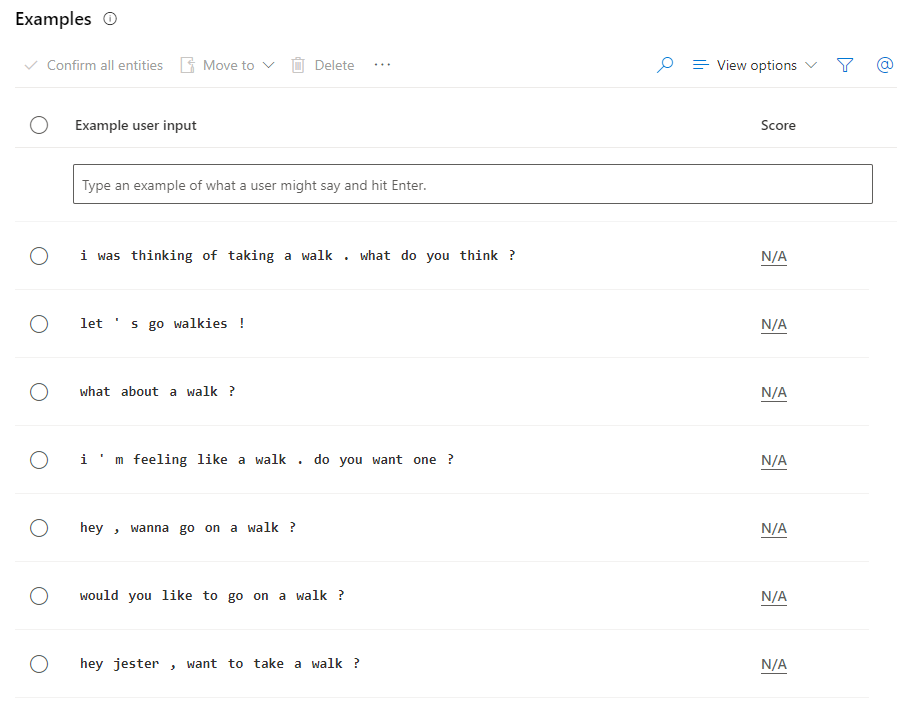
Here I’ll add a number of different utterances that would convey taking a walk:
Performance Tip: Microsoft recommends at least 10 - 15 utterances per intent, including the None intent.
Additionally, Microsoft recommends avoiding disparaties in utterance counts between intents. They recommend no more than a 2:1 ratio between your largest and smallest counts of utterances.
Training LUIS
Once you have configured your intents and have at least one utterance per intent, click the Train button on the toolbar.
This will queue your app for training and then display a series of notifications until your app is trained.
What Azure did under the hood here was built a classification machine learning model around your training data at the time you clicked Train.
This model can be used to predict or classify the intent a new utterance likely belongs to.
Key Point: the trained models classify utterances they’ve not seen before into intents based on the utterances you used for training.
This model is not yet available for others to use, so let’s test it and then deploy it.
Testing Prediction Models using LUIS
Click the Test button in the header and watch the test panel slide out.
In the test panel, type in an utterance you used for an intent earlier. For example, I used “What about a walk?" when building my “TakeAWalk” intent earlier, so I’ll type that here and hit enter.
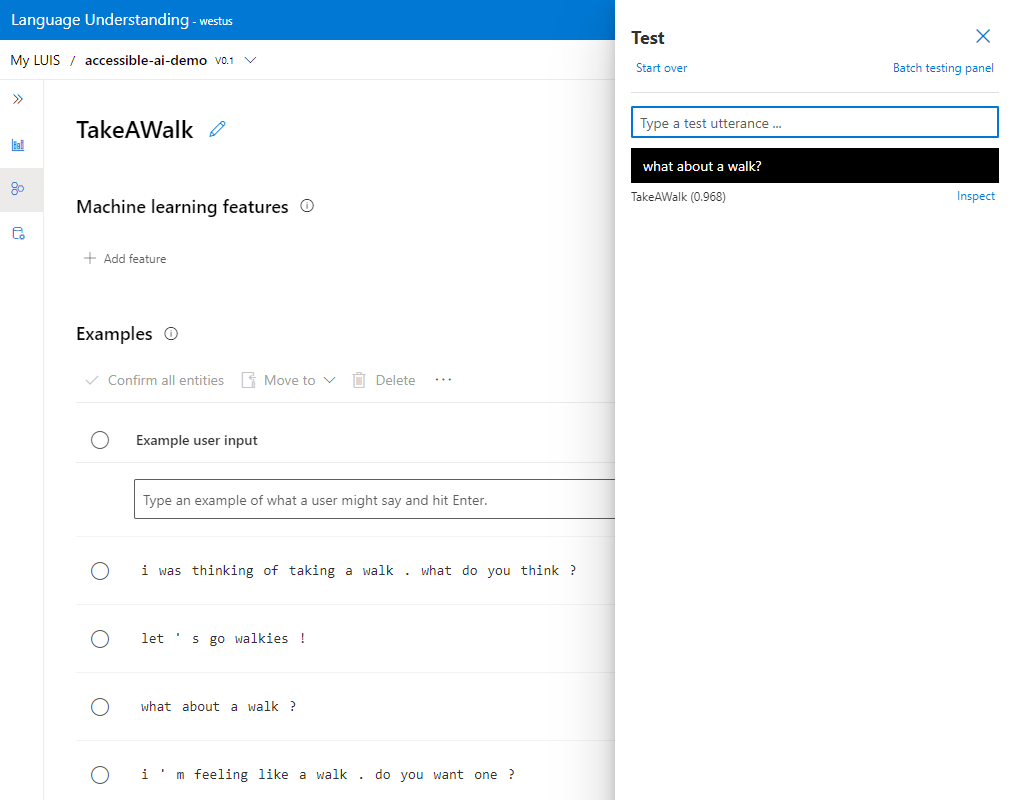
We see from this that the TakeAWalk shows up in the results with a 0.968 next to it. This means that LUIS is 96.8 % confident that my utterance matches the TakeAWalk intent.
Billing Note: while predictions are generally cheap on LUIS, you should be aware that you are still billed for predictions made in the testing pane.
If I type something random in the testing pane, like “I hate technical debt”, LUIS won’t know what to do with it:
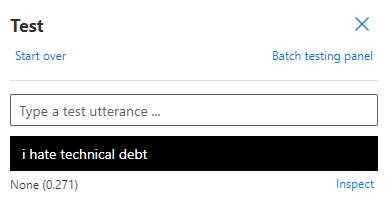
Here this utterance matched the None intent with 27.1 % probability, which is the right intent, but a low probability. I might want to add this utterance to the None intent and retrain the model in the future.
Another thing that could have happened is the utterance might match a different intent than the none intent, but have a low probability. Here’s the result of “I want to fly to space!":
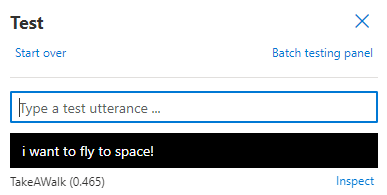
Here it matched the TakeAWalk intent with 46.5 % confidence.
This brings up a few key points:
- Even if something matches an intent, you might still want to ignore it if the confidence score is too low (below 60 % is my benchmark).
- When random utterances match intents other than the None intent, it’s probably a good idea to add them to the None intent, especially if their confidence score is higher than you’d like it to be (above 20 % is my benchmark).
- If you’re not comfortable with your performance of your LUIS model, go back to the Build pane and add additional utterances to intents, train your model again, and test it out until you’re more comfortable with the results you’re seeing.
Deploying Prediction Models using LUIS
Once you’re happy with a model’s performance, click Publish on the header.
The publish user interface allows you to create or update a REST endpoint that others can call to generate predictions from their text, much like you did in the Test pane earlier.
From here you can choose a Staging Slot meant for internal testing, or the Production Slot meant for live use by users.
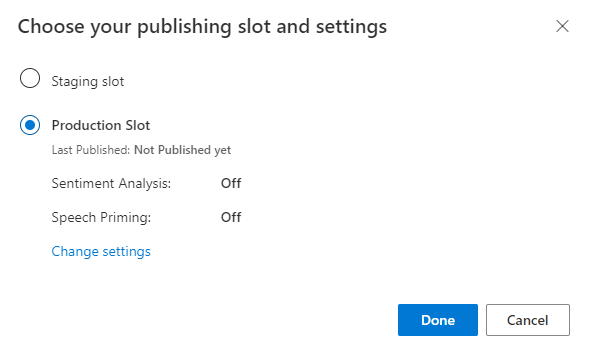
You can also optionally turn on sentiment analysis or speech priming to help your LUIS results provide more meaning as to the user’s attitude or prepare the response to be more easily spoken by Azure speech services respectively.
Select the Production slot and click Done.
Your LUIS Endpoint is now published and available for others to interact with.
Getting your LUIS Endpoint
If you wanted to get your LUIS Endpoint, the best way of doing this is finding your LUIS resource in the Azure Portal and clicking on the Keys and Endpoint “blade” on the sidebar:
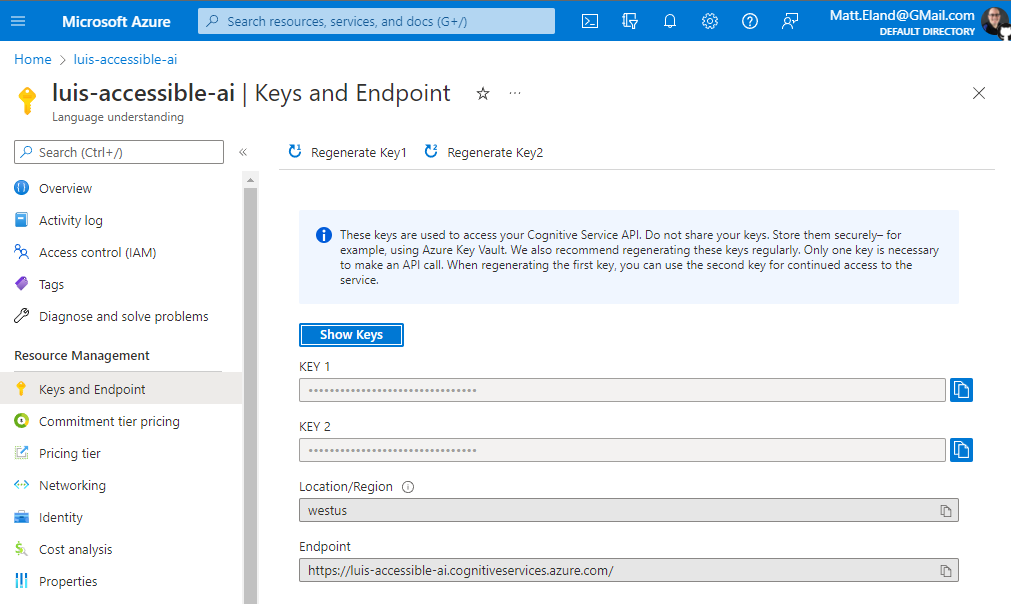
This provides you the endpoint used to make predictions using your LUIS resource as well as two different API keys that can be used to authenticate access to this endpoint. Your app will only need one of these two keys, but Azure provides two so that applications can be migrated from key 1 to key 2 and old keys can be regenerated and replaced periodically for security purposes.
Any application that can make a REST request can use this information to POST to this endpoint and get a prediction back. See Microsoft’s LUIS REST documentation for additional information.
If you’re curious about consuming LUIS endpoints using the Cognitive Services SDK, take a look at my article on generating LUIS predictions from .NET code using C#.